2Notify – a Microsoft Dynamics 365 Business Central solution that allows users to receive all necessary information in real time about updates, errors, and training.
What do I need in order to send notifications to my clients?
- Create an Entra user in the Microsoft 365. Instructions on how to do this here.
- Create or locate the environment from which you will act as the provider and send notifications.
- Install 2Notify both in your own environment and in your clients’ environments. You can install it from AppSource.
- Create 2Notify categories and assign yourself the necessary 2Notify permissions.
- In a test environment or at the client’s site, create your own supplier account.
2Notify categories and permission assignment
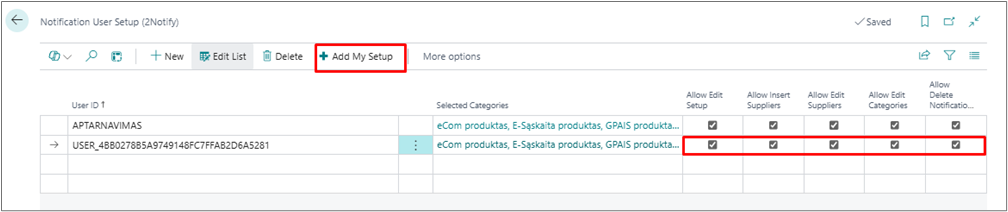
In the Supplier environment, go to the 2Notify User Setup page and assign your user the permissions to edit the 2Notify product:
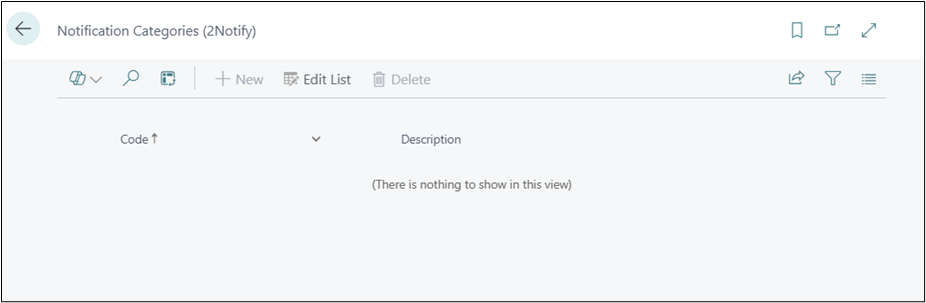
In the Supplier environment, go to the Notification Categories (2Notify) page and create the desired notification categories (for example: Product Names, Marketing, Information, Updates, etc.):
That's it - the 2Notify product is now ready to use and deploy to clients.
Creating a supplier account at the client’s site
Before you start installing 2Notify for clients, it must be installed first. We recommend doing this manually, or alternatively, creating dependencies for your own product so that the 2Notify product is installed automatically during installation or update. Read more about this below.
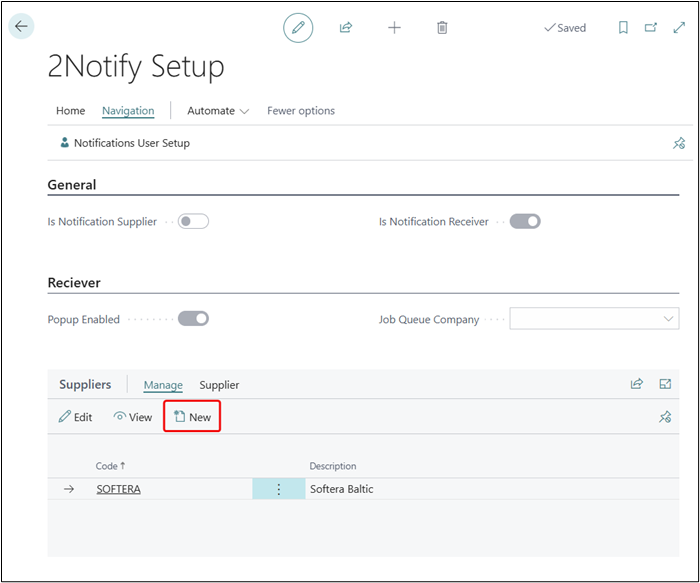
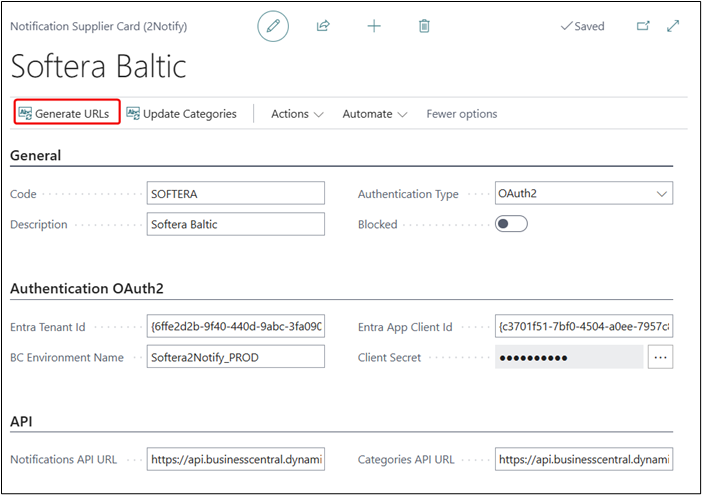
- Go to the 2Notify Setup page and, under the Suppliers section, click New:
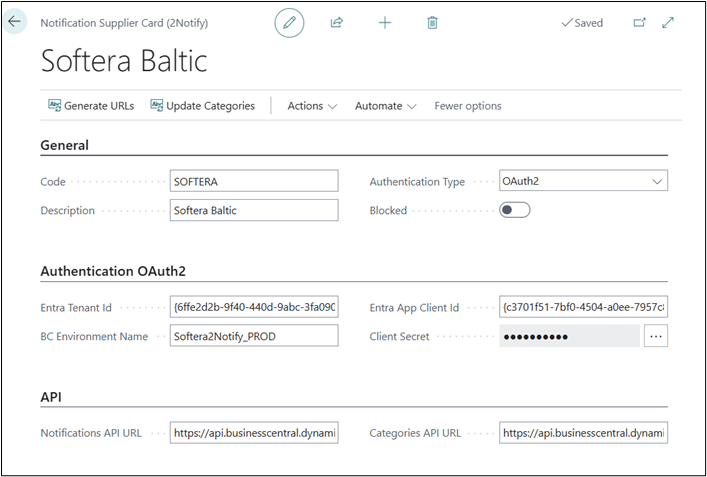
This window will open, and you need to fill it in:
When we have the Business Central environment URL https://businesscentral.dynamics.com/6ffe1a2f-2f82-880d-9abc-8ga150b8884a/2Notify_PROD, then:
- Entra Tenant Id: 6ffe1a2f-2f82-880d-9abc-8ga150b8884a
- BC Environment Name: 2Notify_PROD
| Field | Description |
|---|---|
| General | |
| Code | Enter the supplier name. |
| Description | Provide a description of the supplier. |
| Authentication Type | Select OAuth2. |
| Blocked | Leave empty. If you want to block the supplier, set this to True. |
| Authentication OAuth2 | |
| Entra Tenant Id | Specify the Tenant ID of the environment from which notifications will be sent. |
| BC Environment Name | Specify the name of the environment from which notifications will be sent. |
| Entra App Client Id | Enter the App Client ID you created. |
| Client Secret | Enter the Entra App Client Secret code. |
| API | |
| Notifications API URL | This will be filled in automatically after generating URLs using the "Generate URL's" function. |
| Categories API URL | This will be filled in automatically after generating URLs using the "Generate URL's" function. |
Once all the data is filled in, click the Generate URL's function:
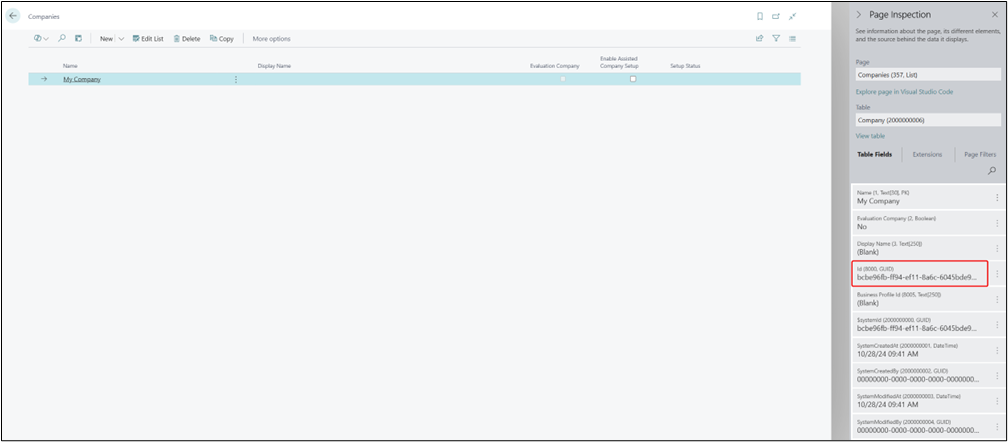
When you click this function, you will need to enter the GUID code (Company ID) of the supplier environment's company, which you can find by going to Companies and pressing CTRL + ALT + F1:
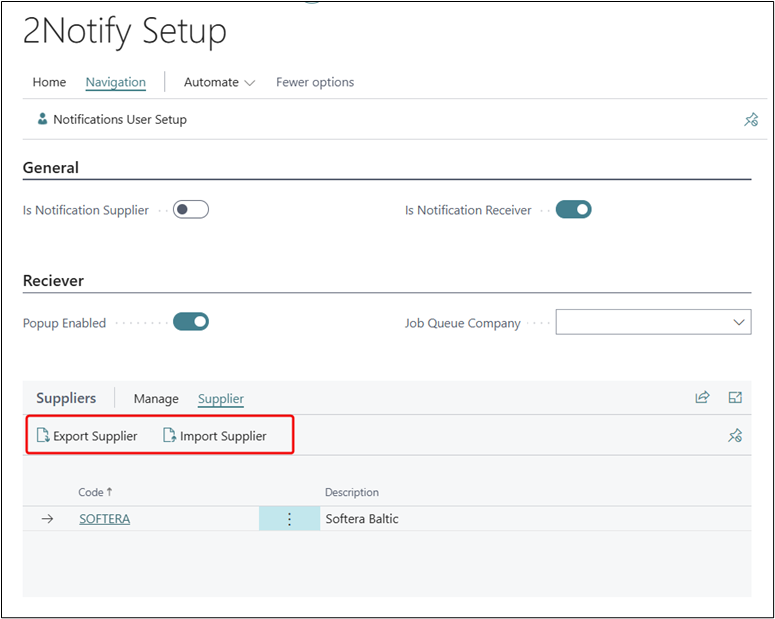
Once everything is filled in and the URLs have been successfully generated, you can export the Supplier file and import it for your other clients:
2Notify job queues
In order for notification delivery and 2Notify category updates to function properly, job queues must be running on the client side. Each time a client logs in, they will be prompted with a message indicating that one or more 2Notify job queues are not active. With a single click, they will be able to activate them, and notifications will begin to be received.
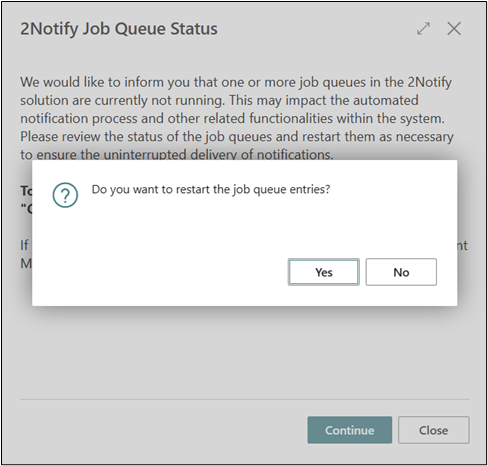
The message shown to the client looks like this:
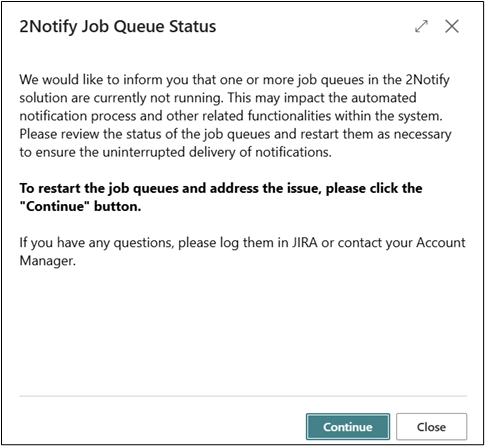
When the client clicks Continue, they are prompted to activate the job queues with a single button click:
There are two job queues, and they are created automatically when the 2Notify product is installed in Business Central:

Once the client activates the job queues, notifications and categories will be updated every 240 minutes.
If the job queues stop working, an error will occur, and users logged into Business Central will receive a notification prompting them to re-enable the job queues.
Automatic 2Notify installation for your clients
You can add dependencies to 2Notify in your own product. This way, when installing or updating your product, 2Notify will be installed automatically as well:
{
    "id": "3ed3b7e1-3819-430f-8ace-4eae00778650",
    "name": "2Notify",
    "publisher": "Softera Baltic",
    "version": "25.0.2.0"
}
Additionally, during the installation or update of your product, you can configure it so that the supplier account is automatically created on the client’s side, eliminating the need to do it manually:
procedure Add2NotifySetup()
var
    S2NotifySetup: Record "SLE2N 2Notify Setup";
    S2NotifySupplier: Record "SLE2N Notification Supplier";
    ClientSecret: SecretText;
begin
    if not S2NotifySetup.Get() then begin
        S2NotifySetup.Init();
        S2NotifySetup.Validate("Is Notification Reciever", true);
        S2NotifySetup.Validate("Popup Enabled", true);
        S2NotifySetup.Insert(true);
    end else
        if not S2NotifySetup."Is Notification Supplier" then begin
            S2NotifySetup.Validate("Is Notification Reciever", true);
            S2NotifySetup.Modify(true);
        end;

    if S2NotifySetup."Is Notification Supplier" then
        exit;

    if not S2NotifySupplier.Get('NAME') then begin // Replace 'NAME' with actual supplier code you want to use
        S2NotifySupplier.Init();
        S2NotifySupplier.Validate("Code", 'NAME'); // Replace with actual code
        S2NotifySupplier.Validate(Description, 'Display Name'); // Replace with actual display name
        S2NotifySupplier.Insert(true);
    end;

    S2NotifySupplier.Validate("Authentication Type", Enum::"SLE2N Authentication Type"::OAuth2);
    S2NotifySupplier.Validate("Entra Tenant Id", '00000000-0000-0000-0000-000000000000'); // Replace with actual tenant ID
    S2NotifySupplier.Validate("BC Environment Name", 'Environment_Name'); // Replace with actual environment name
    S2NotifySupplier.Validate("Entra App Client Id", '00000000-0000-0000-0000-000000000000'); // Replace with actual client ID
    ClientSecret := Format('Client_Secret'); // Replace with actual client secret
    S2NotifySupplier.SetClientSecret(ClientSecret);

    S2NotifySupplier."Notifications API URL" := 'url_to_notifications_api'; // Replace with actual API URL
    S2NotifySupplier."Categories API URL" := 'url_to_categories_api'; // Replace with actual API URL
    S2NotifySupplier.Modify(true);
end;