PURPOSE OF JIRA SERVICE DESK
The main purpose of JIRA Service Desk is to facilitate communication between the clients and UAB “Softera Baltic” employees. Furthermore, it helps to solve new tasks and problems more efficiently. In the JIRA Service Desk system, you can easily report the problems, follow the states and terms, comment, attach files and trace back all the history.
Please do not write confidential information or upload pictures with confidential data. Keep in mind that the information you provide is accessible to other employees of your company.
Below you will find a description of how to create a request, which is only accessible to you.
LOGGING IN
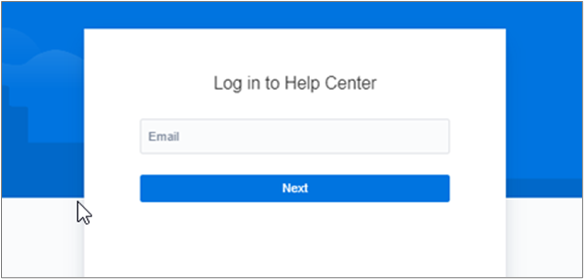
Open the link support.softera.lt in your browser. Enter your email in the login window and press Next.
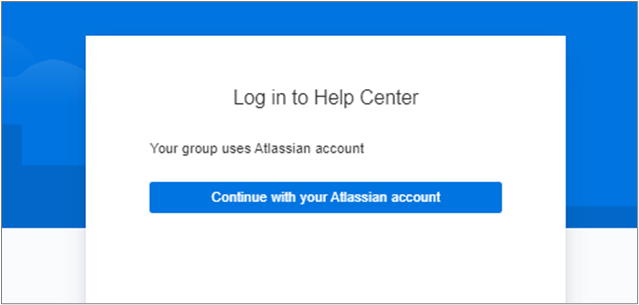
In the next step you will receive a message that Your group uses Atlassian account, press Continue with you Atlassian account.
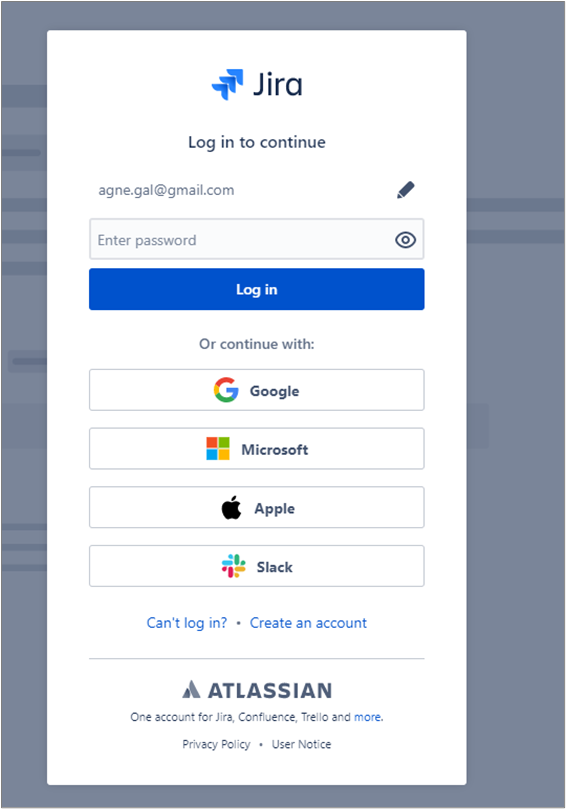
Then enter your password and press Log in.
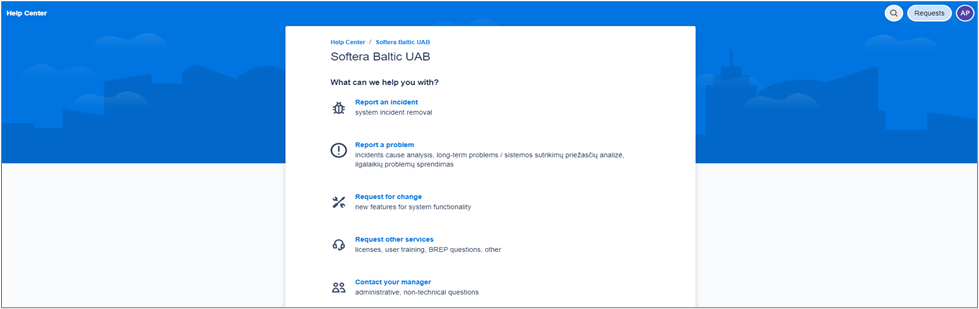
In the middle of your browser window you should see the name of the project which you are participating in (e.g. name of the company). Make sure that the name of your project is correct, otherwise, you can create a new task in the query window that opens.
At the top and on the right side of your browser window there is a possibility go to your Profile, which one you can edit, or Log out from the system.


In your Profile you can change password (Change password), photo (Change avatar), Name, E-mail (Send notifications to), Language or Time zone by clicking Edit your profile. When you have changed something, and want to save it, you must click Save.
REPORTING A NEW PROBLEM
In JIRA Service Desk system there are 5 types of requests:
- incident,
- problem,
- change,
- other services
- contact with manager.
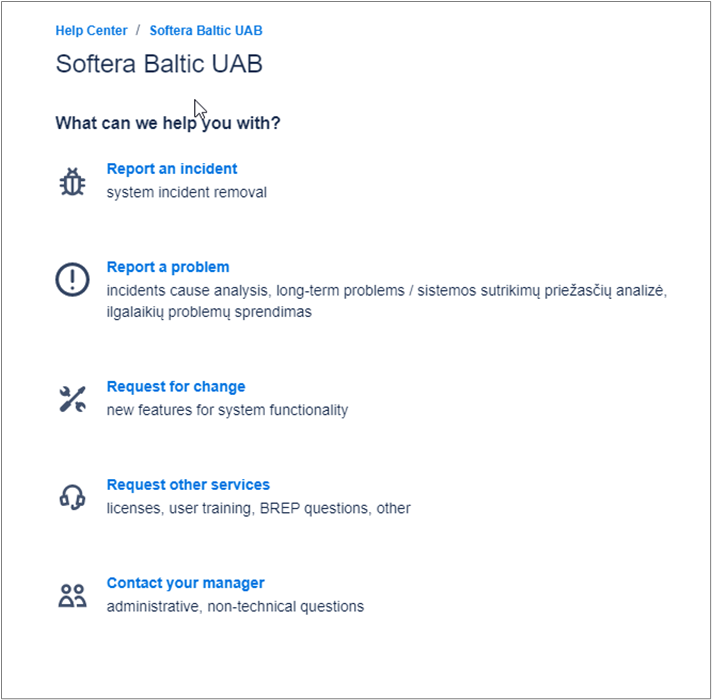
Incident
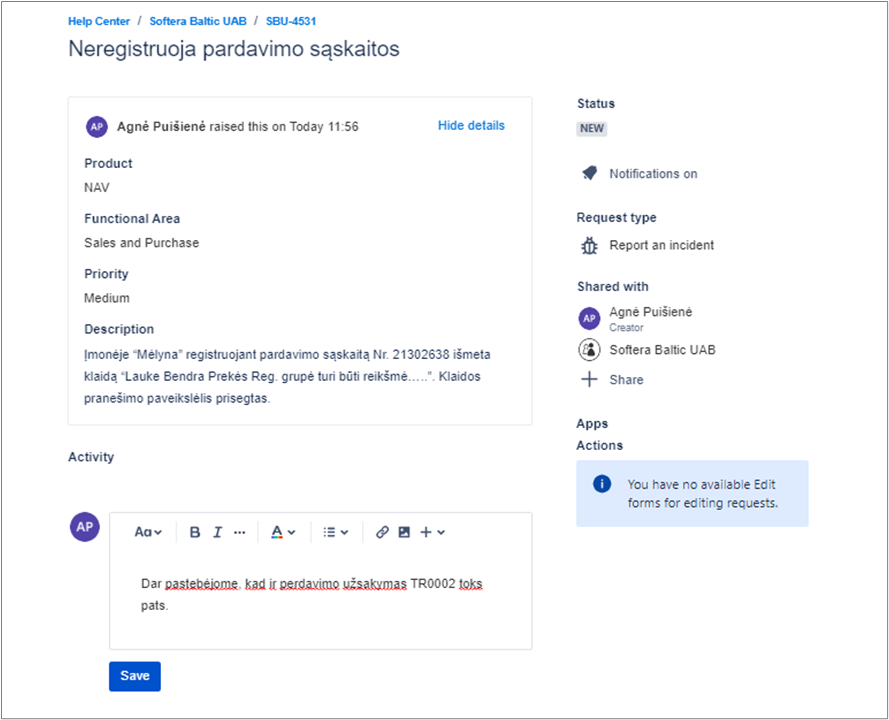
To report a new system incident (e.g.: you receive an error message during a posting process, sales order does not delete, report does not generate) click Report an incident.
In the window that opens, choose product (BI, CRM, DU, NAV, Other), functional area (mandatory for NAV requests), priority, fill out summary, description, attach any relevant files.
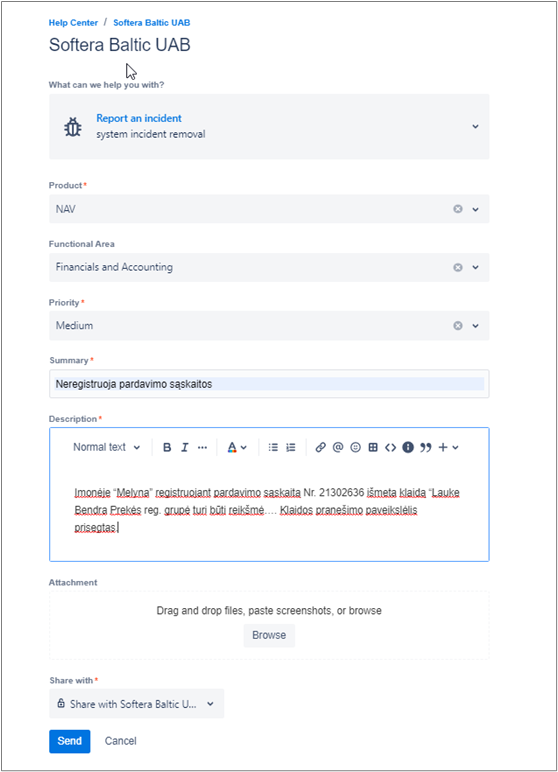
You can also choose who can see your request. If you choose No one, only you will see the query but if you choose Share with… (in example Softera Baltic UAB), then all of your company’s employees who have access to the JIRA Service Desk system, will see the request.
When describing the problem, please do not write confidential information, but provide as much information as possible. Make sure that all the points below are covered:
• Which part of the system is facing a problem;
• What is the purpose of changes (why these changes are being made);
• If the problem is related to the new report or form, you have to put the template of your report or form, specifying how each new field is calculated.
It is also important to specify the right priority for the request:
- Critical - The system is not functioning at all or the function critical for business is not functioning in the production environment.
- High - An incident of large scope that has a significant impact on the activities and temporary evasion is not possible.
- Medium - An incident that has a negligible impact on the activities but that does not prevent business functions from being implemented.
- Low - A small incident that has a small impact on the activities or that may be evaded temporarily.
- Planned - An incident that has almost no impact on the activities or that may be evaded temporarily.
To post the request click Send button.
Problem
To report a new system problem (e.g. entries are being posted incorrectly, the report is being generated incorrectly, some functionality does not work) click Report a problem. In the window that opens, fill out the details following the same logic as reporting incident.
To post the request click Send button.
Change / New demand
To request a new system change or new demand (e.g: the new report is needed, the new company is needed) click Request for change. In the opened window choose similar information as reporting a new system incident.
When describing the problem provide as detailed information as possible about the incident, problem, changes and make sure that you indicated all these points:
• The purpose of changes (why these changes are being made);
• If the problem is related to the new report or form, please include the template of your report or form, specifying how each new field is calculated.
To post the request click Send button.
Other services
To request other services (e.g. additional workplace, license, training for new employee) click Request other services. In the window that opens, fill out the details following the same logic as reporting incident.
To post the request click Send button.
Contact your manager
To contact your manager (e.g. invoices, payment or other administrative, non-technical questions) click Contact your manager. In the window that opens, fill out the details following the same logic as reporting incident.
To post the request click Send button.
Report a problem by email
You can create a new request by sending an email to the e-mail address forwarded by the key account manager after the creation of Jira (it is usually "company name@softera.lt"). The request is created only if it is sent by a user registered in Jira. If the request is sent from an unregistered user email, the request will not be created.
SHARING NOTIFICATIONS
By submitting reports in Jira Service Desk system, you can choose whether information about your request and the query will be available to other users in your organization, whether it will be private.
• In the case, when you decide give request privately, choose No one opportunity. Then your request will be accessible and visible only to you and Softera Baltic UAB employees until you decide to share it with a particular person in your organization, or the entire organization. E-mails of request status changes will receive only you (as a query creator).
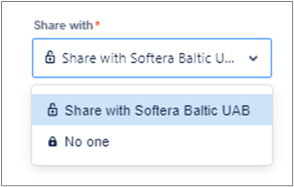
• When you decide to share your request with organization and make it public, choose Share with... (for example Softera Baltic UAB) at request creation time or later – Share.

• If the user wishes, in the request window he can choose to receive further notifications about activity related to this request (comments, status changes, etc.). To enable this function, the user opened the query and on the right corner of the screen must hit Notifications on button.

• Pressing button it changes to Notifications on, if necessary this function allows to disable getting e-mails about query status changes Notifications off.

• When you share your query with the whole organization, then e-mails about your query status changes get only you and other employees only see your created query but letters of request status changes do not receive.
• When you share your query to a particular employee then the letters of request status changes receive you (as query creator) and that employee.
REQUESTS REVIEW AND EDITING
To review queries, click Requests in the upper right corner of the window. Now you can choose of three options:
• Created by me
• Requests of your organization or organizations (for example - Softera Baltic UAB)
• All requests

If you choose All requests, in the window that opens you can see all requests related to your project.
You can filter the requests by:
• Request Status
• Type
• Created by me
• Created by anyone
• Where I am a participant
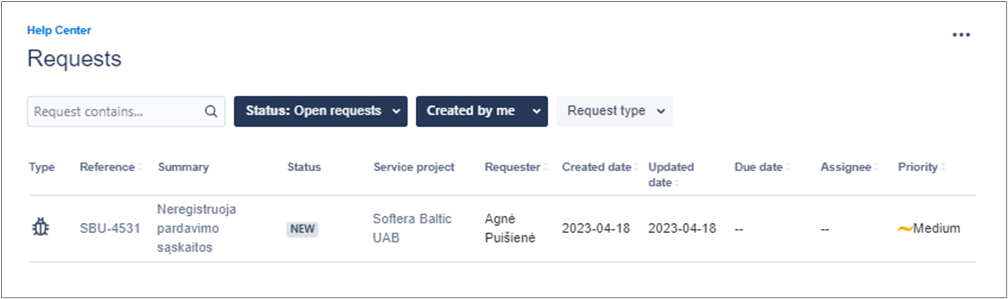
Select the request that you want to edit and click on the reference number. The request card that opens is the main place to communicate with the consultant. Here you may write comments or add attachments. After adding a comment, click Save.
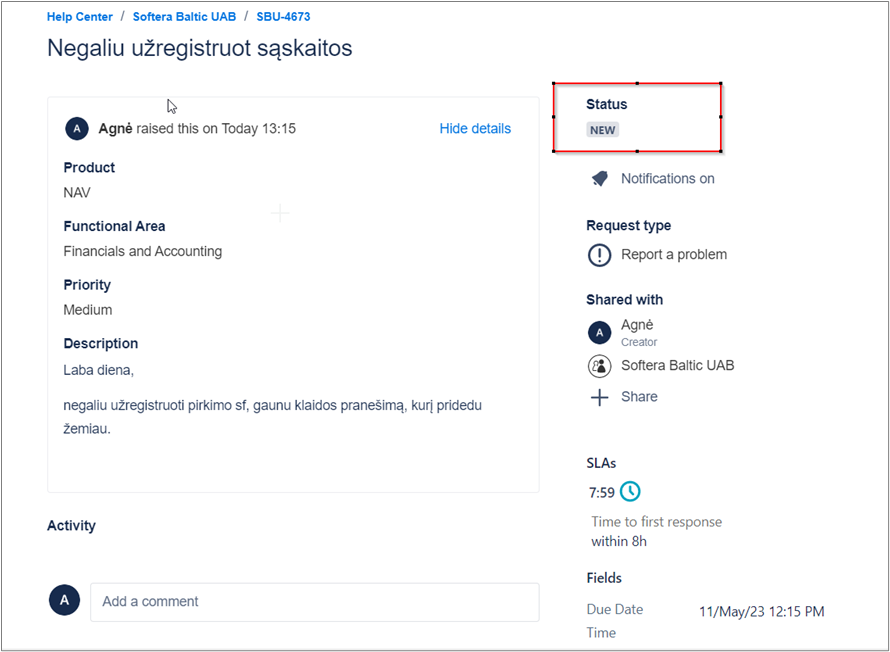
STATUS OF REQUEST
Status of problem request
Each request has its own status, which identifies the step in the service process and gives certain information for consumer or solver.
Newly created requests status are tagged New. It means, that request is waiting for initial consultant reaction.
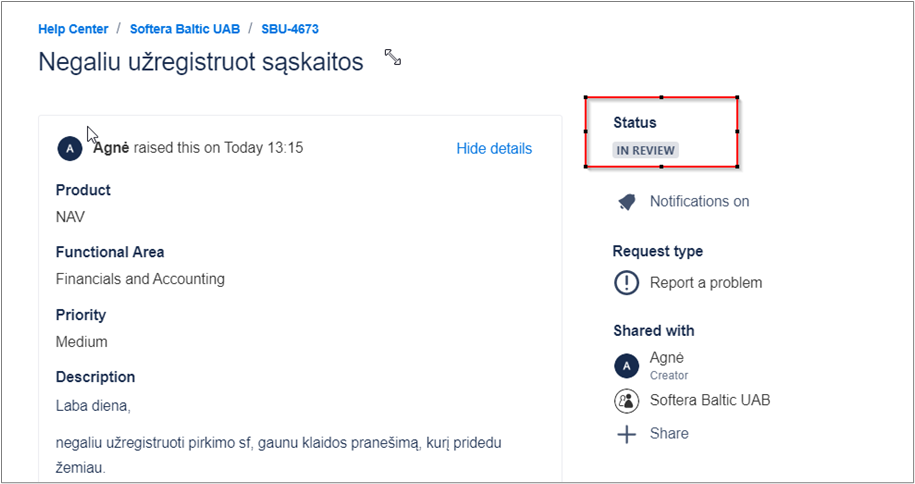
Request status In review identifies that, initial review of request is in process. Currently consultant is analyzing information, which is provided, trying to replicate the problem, identifying complexity level of request.
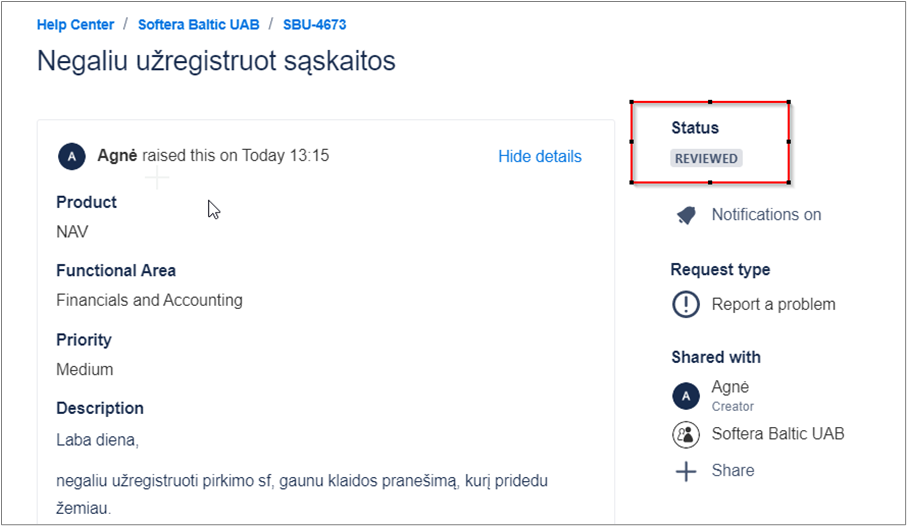
If your request is clear for consultant, the error situation was replicated, provided information is sufficient for next step, then request status is changed to Reviewed.
If the solver has any questions or concerns, he/she writes comments and changes status to Awaiting more information. Requests with status Awaiting more information, requires repeated review and your reaction.
When request status is Awaiting more information, you just need to provide an answer – enter new comment and then request status changes to In review.
When consultant is solving / analyzing / estimating / designing your request, its status changes to In Progress. Also, consultant provides due date for the next step to be completed (provide results of analysis, design solution, correct the error, code the new demand).
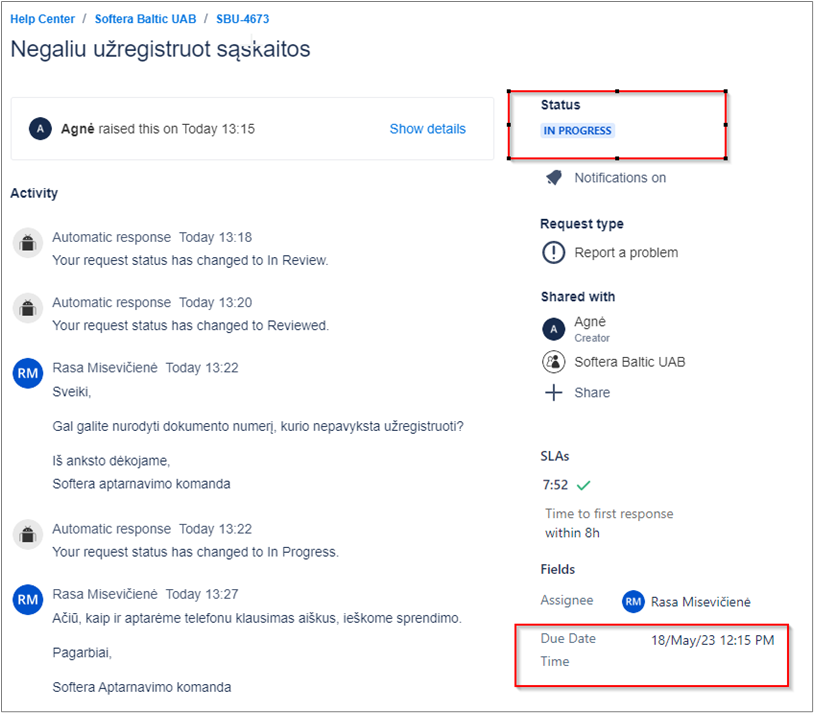
Request with status In Progress due date is presented at the bottom of the request card.
Estimated time needed to complete request consultant submits the work duration in hours and request status changes to Awaiting Approval.
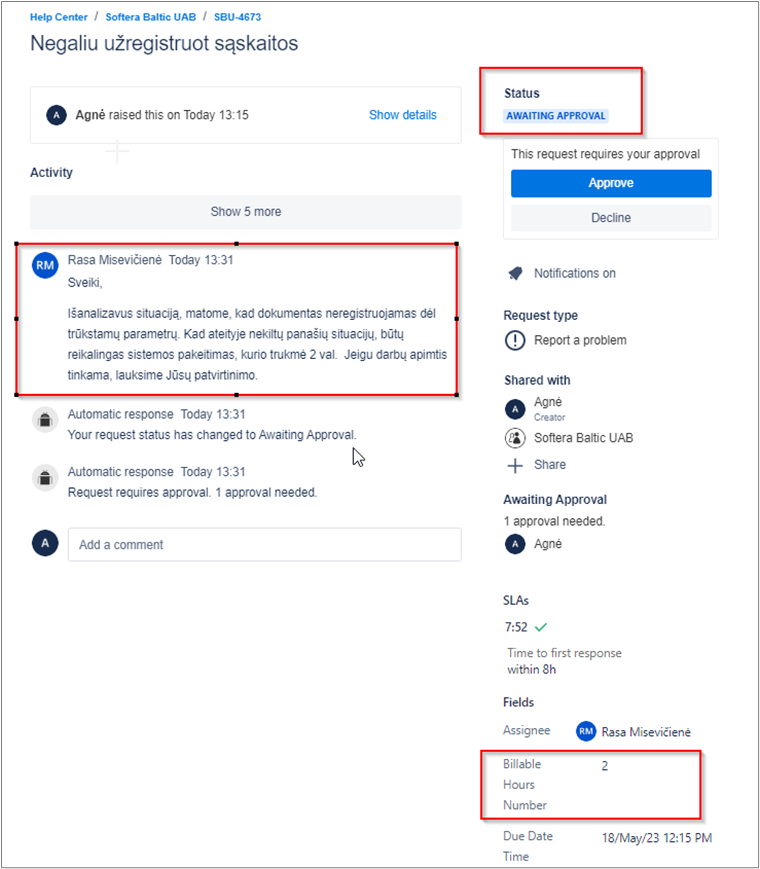
The work duration estimate is presented in comment and Billable Hours Number field.
If you agree with the work duration estimate, you need to approve the request – click Approve.
If you would like to cancel the request – click Decline.
please be reminded that analysis and solution designing hours are billable even though you refuse further work related to the request.

If you think that the consultant estimate does not match your needs/ possibilities or the work is not fully designed, then you may write comments and request status automatically changes to Waiting for support. Such requests require repeated consultant review and reaction.
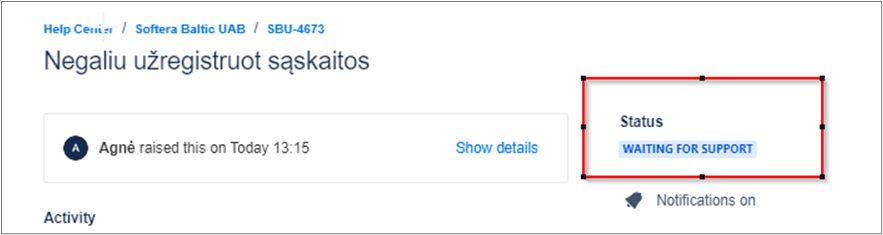
Approved/declined requests status changes to Waiting for support, also Awaiting Approval status changes to Approved/Declined.
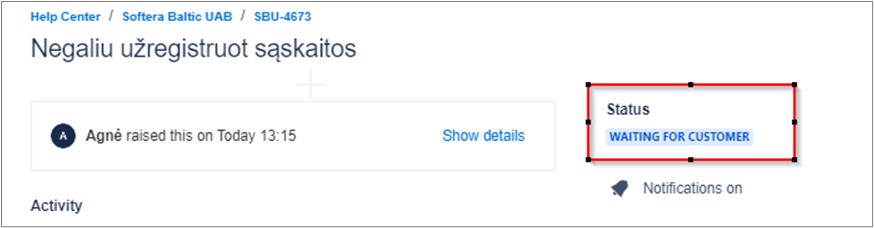
If during request solving time consultant has questions, these questions will be presented in comments, so even approved request status may be changed to Waiting for customer. Requests with this status requires repeated review and your reaction. When you respond, request status automatically changes to Waiting for support. Such requests require repeated consultant review and reaction.
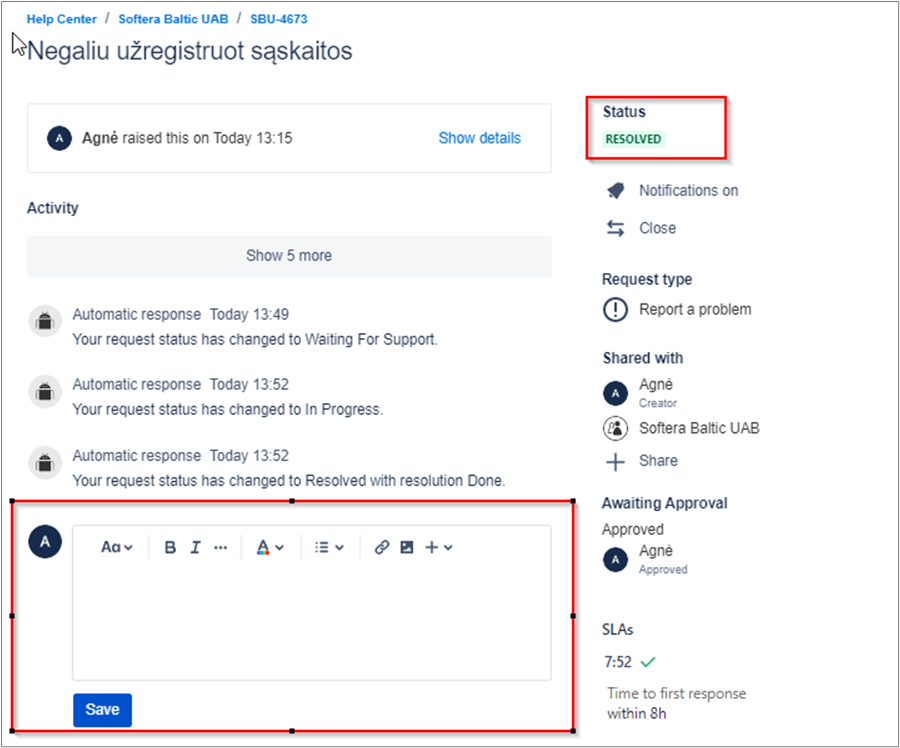
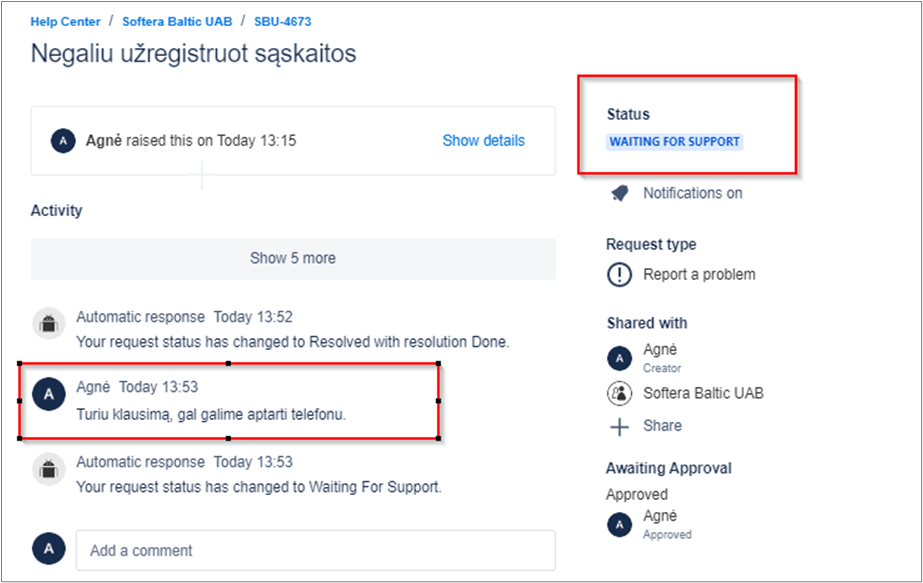
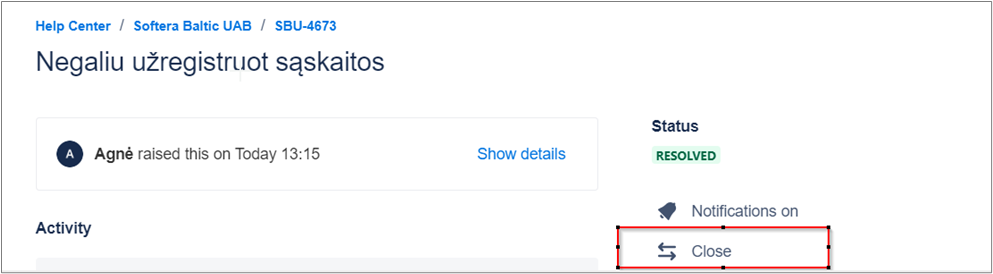
When consultant solves the problem, request status changes to Resolved. During testing process, it is client’s responsibility to verify whether the task is completed correctly.
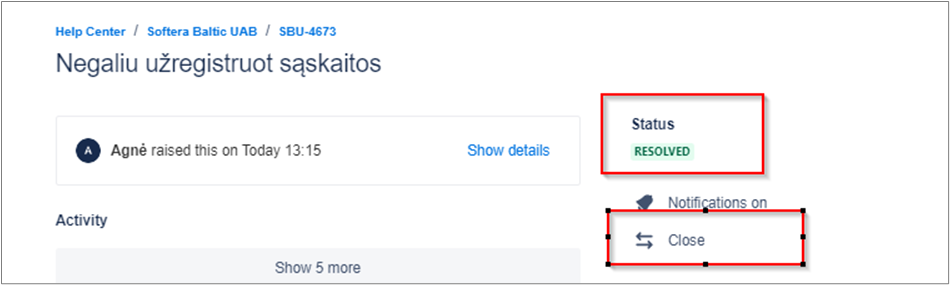
If the task is not fully resolved, please enter the comment, and click Save, request will be assigned to consultant automatically.

If request is fulfilled completely, close the problem – click action Close. Request status changes to Closed.
Last 3 statuses are related to invoicing. Status To be billed identifies, that request will be included in the monthly invoice. Status Billing not required, means that request will not be included in the monthly invoice, as it is not paid (guarantee by the project or service contract). Status Billed – request included in invoice.
Statuses of incident, manager request or other services request
Incident has the same statuses as problem, but it does not have statuses In review, Reviewed, Awaiting more information, Awaiting Approval.
Management request and other services do not have statuses In review, Reviewed, Awaiting more information. All other statuses are the same as problem status.
Statuses of change
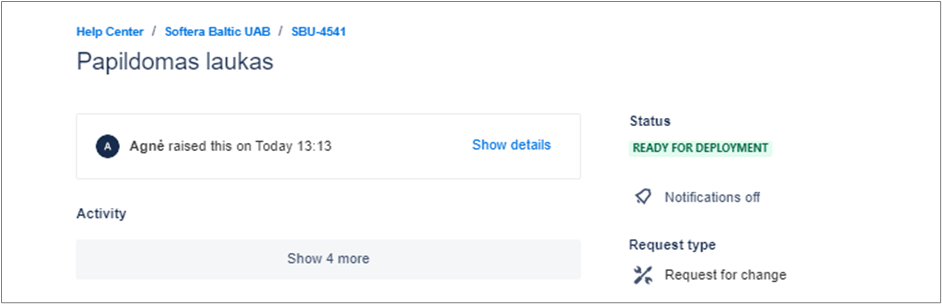
In case of change, all the statuses are the same as problem status and it also has two additional statuses – Customer Testing and Ready for deployment.
When the changes are made and uploaded to test environment, the status changes to Customer Testing:
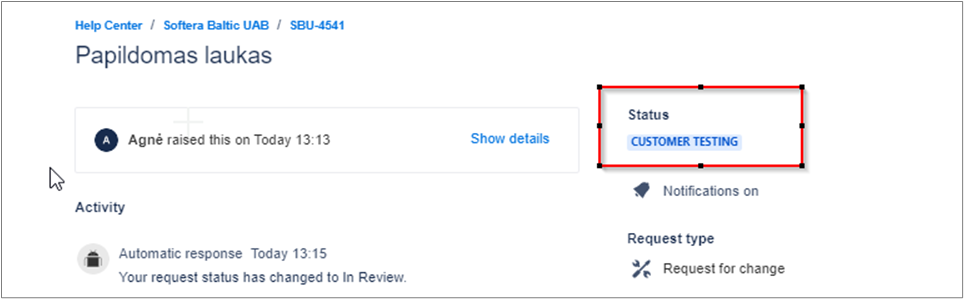
During this status, your duty is to test the change and check if everything works correctly.
Once the testing is done and everything works correctly, the status can be changed to Ready for deployment status. This means that the change is ready to be uploaded to production environment:
REQUEST CONFIRMATION / CANCELLATION
You need carefully review and analyze answers of requests with status Waiting for approval. If you confirm designed solution of work and estimation, then approve request – click Approve.
During approving process in opened window, you need to approve hours. Comments are not mandatory, but you may fill out any additional info.
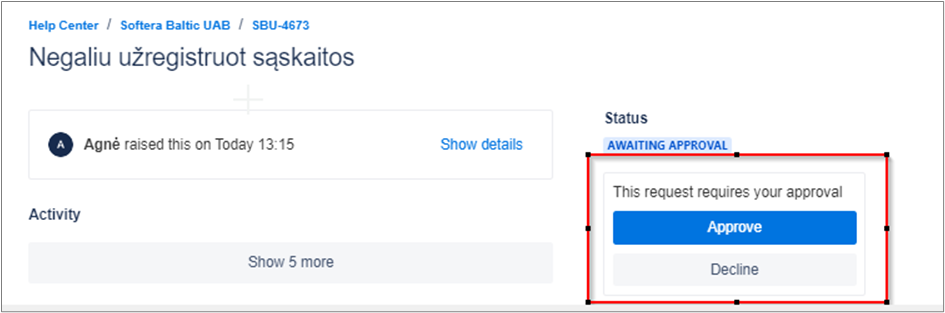
If submitted request estimate is inappropriate for you, request is no more relevant or you are planning to process request in the future, please cancel the request – click Decline. In this case comment are necessary, please provide info as to why the request was cancelled.
CLOSURE OF REQUEST
When consultant has completed the request, you have tested it and the task was completed correctly, then you need to close those problems by clicking Close.
By closing the request, it is confirmed that it was fully completed and may not be renewed.
An example of closing query is given below:
- In Requests list put filters as shown in the example.

- If request is fulfilled completely, close the problem – click action Close.
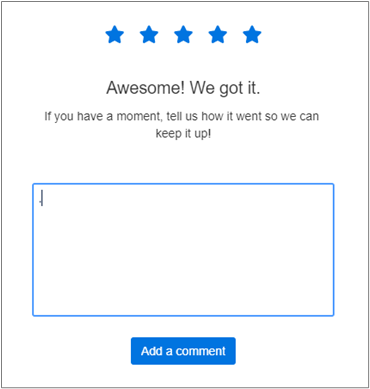
3. During closing it is necessary to rate the performance.
During closing the performance, please rate consultant’s work and leave a comment, insights on how to improve our work. Your opinion is very important to us, in order to continuously improve the quality of the service process. The evaluation request will reach you by e-mail, please choose as many stars as you are satisfied with the quality of the consultant's services:
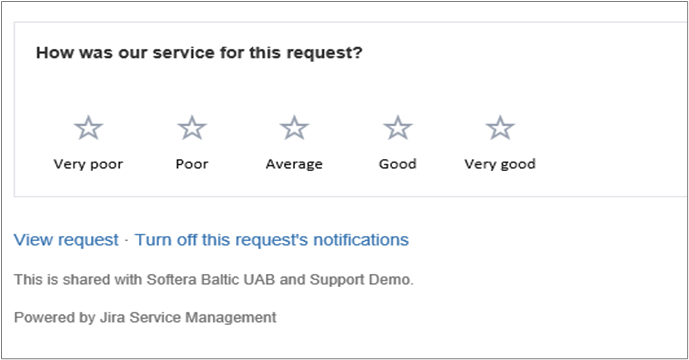
- Request status changes to Closed.
