Choose display data
The Role Center can be set to show planning data for every user or only the records assigned to you. The choice is made from the View Mode menu and applies to all stacks, queues, and alerts on the page until it is changed.
To see planning data for every user, open the Links on the Role Center and choose Show All Data. The Role Center stacks and lists are then refreshed to include records owned by all users.
To see only the records assigned to you, open the same Links and choose Show My Data. The Role Center is filtered to the items, worksheets, and alerts where you are the responsible employee.
DDMRP Past Chart
The DDMRP Past Chart is an embedded chart pane available on two pages: States and Alerts and the Requisition Worksheet. On both pages it works identically — the pane is shown at the bottom of the page and always displays the chart for the SKU of the currently selected line. The chart actions are found in the Chart menu of each page. The historical data behind the chart can also be reviewed as a list by searching for SKU Past Chart Entries (Softera.DDMRP). To display the chart, choose Enable Auto Generation from the Chart menu — the chart is then redrawn automatically for each line you select. Generation is switched off by default when the page is opened.

The chart shows the selected SKU's on-hand history against its buffer zones over time — the red, yellow, and green bands with the On Hand, On Hand + On Order, and Net Flow lines — so you can see how inventory has tracked against the buffer and spot recurring stockouts or overstock.
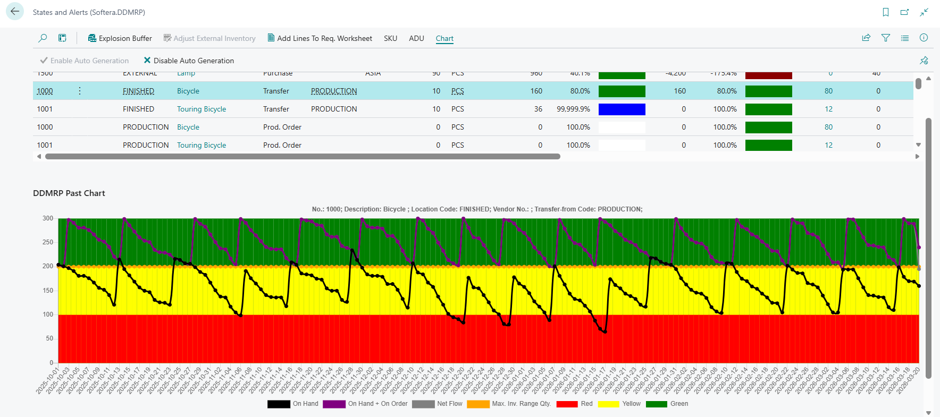
The chart legend elements:
Legend Element | Legend Element Meaning |
|---|---|
Red zone | The Red buffer quantity (Bottom of Red to Top of Red / TOR). Represents the minimum safety stock level. If On Hand or Net Flow drops into this zone, replenishment is critically overdue. |
Yellow zone | The Yellow buffer quantity (TOR to Top of Yellow / TOY). Represents the reorder zone. When Net Flow penetrates into this zone, an order should be placed today. |
Green zone | The Green buffer quantity (TOY to Top of Green / TOG). The zone whose height determines the standard replenishment order size — replenishment targets bringing Net Flow back up to TOG. |
On Hand | Actual recorded on-hand inventory quantity at the close of each historical date. |
On Hand + On Order | On-hand inventory plus all open incoming supply orders. Shows the full replenishment pipeline available before subtracting demand. |
Net Flow | The DDMRP replenishment decision variable: On Hand + On Order + Overflow Quantity − Qualified Outgoing Demand. When this falls below TOY, an order is triggered. |
Max. Inv. Range Qty | The maximum inventory range quantity = Red Buffer + Green Buffer. Acts as the upper inventory-range ceiling used when evaluating generated replenishment lines. |
To stop the automatic refresh, choose Disable Auto Generation from the Chart menu. This is useful when browsing large lists, as drawing the chart for every selected line takes extra time.

Adjust External Inventory
Adjust External Inventory lets you correct the on-hand quantity of a SKU held in an external (Vendor-Managed Inventory) location. It is needed because external stock is not posted through normal receipts and shipments, so its balance can drift from the real quantity at the vendor or customer site — adjusting it keeps DDMRP planning based on the true external on hand. You can open it from two places: the States and Alerts page and the Ext. Item Ledger Entries list; the action works the same in both. External inventory is covered in detail in section External Inventory.
Open it from the States and Alerts page using the Adjust External Inventory action. On the States and Alerts page the action is enabled only when the selected SKU's location is marked as external in Location Setup.

In the dialog, the SKU's external location, item, vendor, and Current Inventory are shown for reference. Enter the corrected amount in New Inventory (or the change in Qty. to Adjust) and confirm — the difference is posted as an external ledger entry so the on-hand balance matches reality.
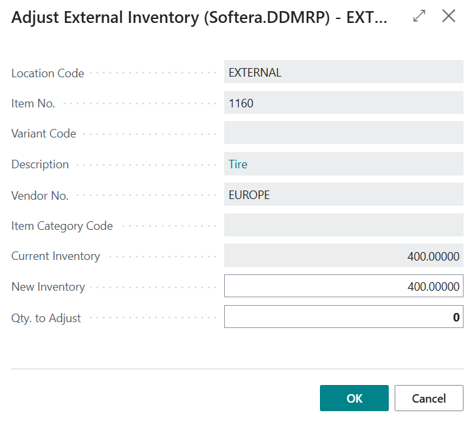
The same action is also available on the Ext. Item Ledger Entries list — choosing Adjust External Inventory there opens the same dialog for the selected SKU.

Explosion Buffer
The buttons described below are found on the Explosion Buffer page. The Explosion Buffer itself can be opened in several ways — in most of them the list opens already filtered to the selected SKU:
from the States and Alerts page, by choosing the Explosion Buffer action for the selected line;
from the Requisition Worksheet, on the Line tab, by choosing Explosion Buffer for the selected line;
from the Stockkeeping Unit Card, by choosing the Show Explosion Buffer action;
from the Role Center Links page, under Miscellaneous, by choosing SKU Explosion Buffer — this opens the full unfiltered list of all explosion buffer entries;
or directly, by searching for SKU Explosion Buffer (Softera.DDMRP) in Business Central.
The page content and its fields are described in section Explosion Buffer.
Set Source Filter / Set SKU Filter
Set Source Filter and Set SKU Filter let you focus on the Explosion Buffer on what you want to investigate. Set Source Filter limits the list to a single source document (for example, one order), so you can trace where a specific supply or demand came from.
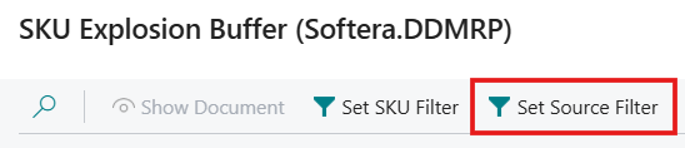
After applying Set Source Filter, the list shows only the explosion buffer entries that belong to the selected source document, so you can follow that one order's supply and demand events and their effect on the projected balance.
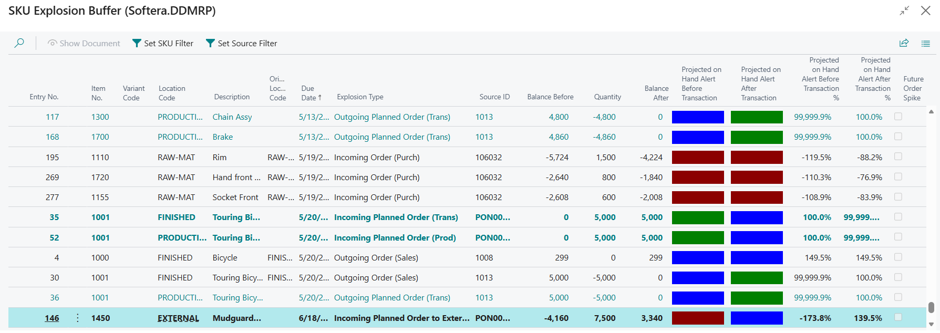
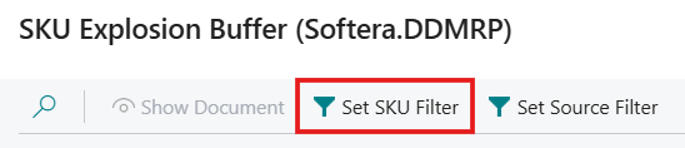
Set SKU Filter narrows the list to a single SKU (item, variant, and location). It shows the selected SKU's explosion buffer — the same view described earlier in Explosion Buffer — so you can see the full chain of supply and demand events behind that SKU's projected balance.
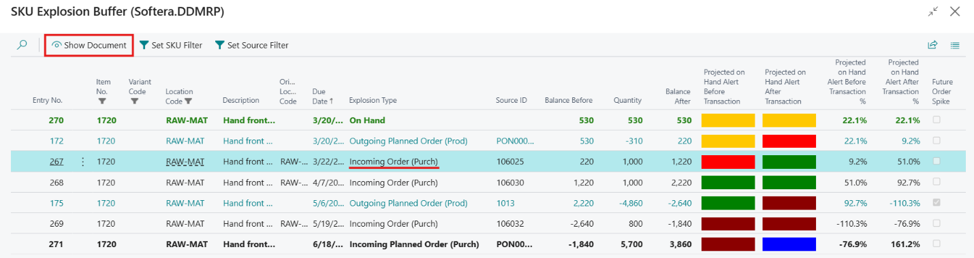
Show Document
Show Document opens the source document behind the selected explosion buffer line — for example, the sales order, purchase order, or production order that created that supply or demand. Use it to jump straight from a buffer entry to the order it came from and review or act on it.
Requisition Worksheet
The buttons described below are found on the Requisition Worksheet page. The page itself and its fields are described in section Requisition Worksheet.
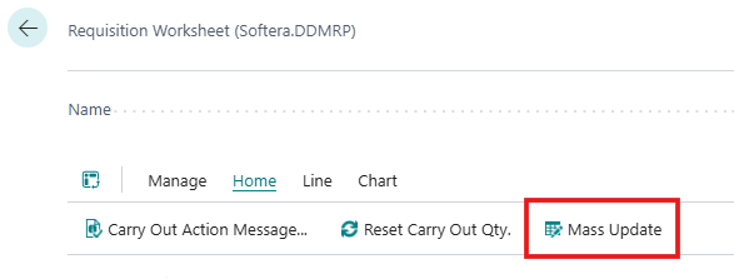
Mass Update
Mass Update lets you change the same field on many requisition lines in one step. It is useful when you need to apply a common value — such as a new due date or share-prioritization setting — across a group of lines, instead of editing each line individually.
Select the lines you want to change on the Requisition Worksheet, then choose Mass Update.
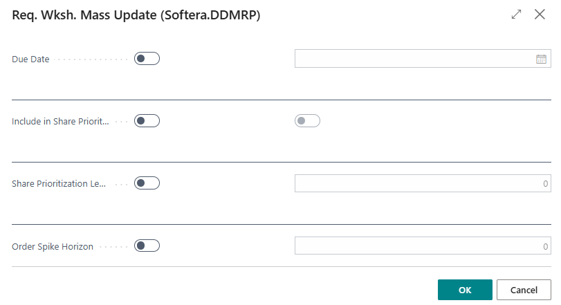
In the Mass Update dialog, switch on the fields you want to change — Due Date, Include in Share Prioritization, Share Prioritization Level, or Order Spike Horizon — and enter the new value. Only the enabled fields are updated; the rest stay as they are. The new values are applied to all selected lines at once — lines that were not selected before opening the dialog, and fields not switched on, stay untouched.
Req. Worksheet Lines
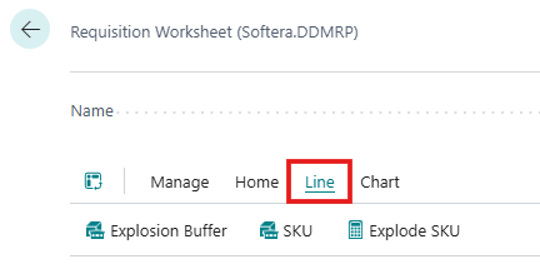
From the Line tab of the Requisition Worksheet you can drill from a selected line into the data behind its proposal:
Explosion Buffer – opens the line's explosion buffer, showing every supply and demand transaction behind the projected balance (see in Explosion Buffer).
SKU – opens the Stockkeeping Unit Card for the line, where you can review or edit its DDMRP parameters (see in SKU parameters).
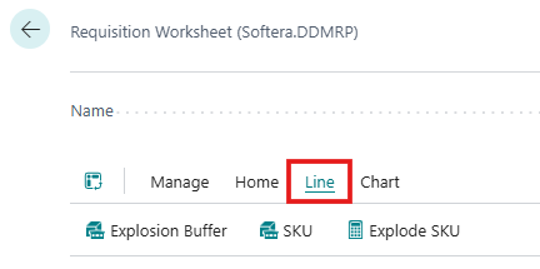
Explode SKU – opens the SKU DLT Explosion, showing how the SKU's Decoupled Lead Time is built up across the supply chain (see in Explode SKU).
Actions related to SKU
The Stockkeeping Unit Card lets you review or edit the selected SKU's DDMRP parameters — explained in detail in section SKU parameters.
The card can be opened from several pages — in each of them it opens for the SKU of the selected line:
from the Stockkeeping Units list, by opening the selected SKU;
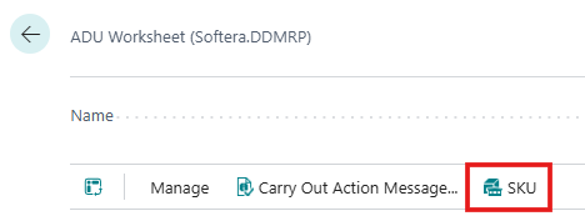
from the ADU Worksheet page, by choosing the SKU action;
from the States and Alerts page, by choosing the SKU action;
from the Requisition Worksheet, on the Line tab, by choosing SKU;
or from the SKU DLT Explosion window, by choosing Open SKU.

Explode SKU
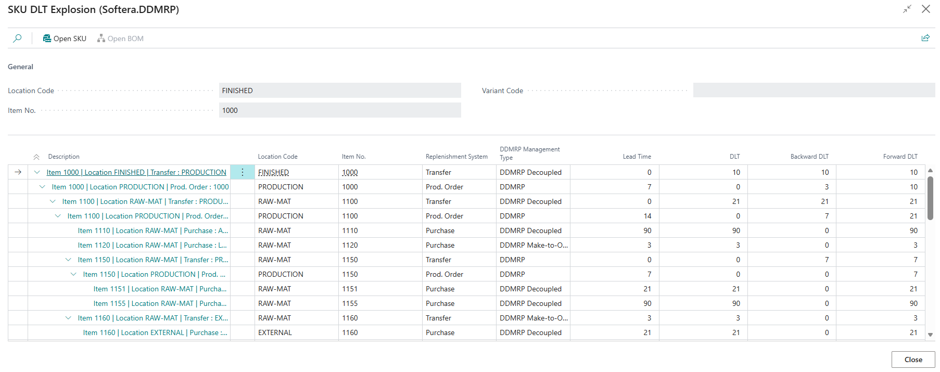
Explode SKU opens the SKU DLT Explosion window for the selected line. Run it from the SKU menu on the States and Alerts page, or from the Line tab of the Requisition Worksheet, to see how the SKU's Decoupled Lead Time is built up across the supply chain.

The SKU DLT Explosion window shows the full supply-chain structure behind the SKU — each component and sourcing level with its Replenishment System, DDMRP Management Type, Lead Time, and Decoupled Lead Time (DLT). Use it to see how the SKU's DLT is built up and where decoupling points sit along the chain.
SKU DLT Explosion
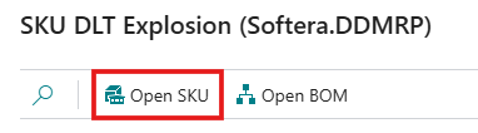
Open BOM opens the Production BOM of the selected line. Run it from the SKU DLT Explosion window using the Open BOM action to review the item's components.
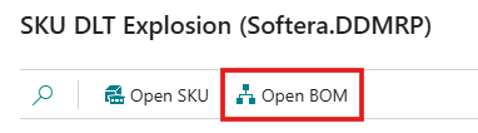
The Production BOM card shows the selected item's bill of materials — its components, quantities per, and units of measure — so you can review the structure the explosion is based on.
Actions related to ADU
The buttons described below are found in the ADU menu of the States and Alerts page. The Calculate ADU action is also available from the Related menu on the Stockkeeping Unit card.
Calculate ADU
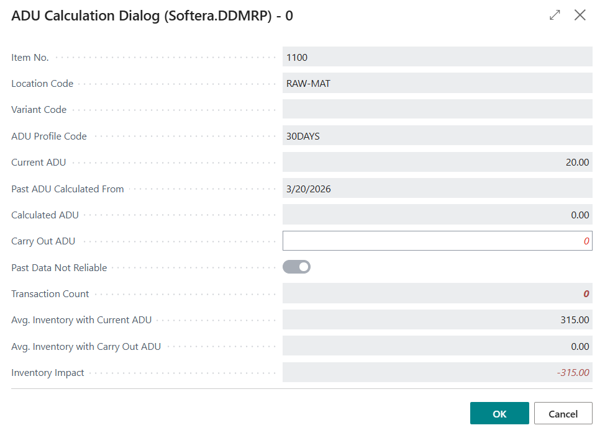
Calculate ADU recalculates the Average Daily Usage for the selected SKU from its consumption history. Run it from the ADU menu using the Calculate ADU action, or from the Related menu on the Stockkeeping Unit card. The result is written back to the SKU's buffer parameters and recorded in ADU Log Entries, so the run is auditable.

The ADU Calculation Dialog shows the result for the selected SKU — its current ADU, the newly calculated ADU, the Carry Out ADU you can apply, the number of transactions it was based on, whether the past data is reliable, and the estimated inventory impact.
ADU Setup
ADU Setup opens the ADU Setup page for the selected SKU, where you can review its ADU and buffer values. Open it from the ADU menu using the ADU Setup action.

The ADU Setup list shows the SKU's calculated ADU and the resulting buffer values (inventory ranges, Yellow Buffer, Buffer TOY/TOG, and the Execution TOR/TOY/TOG levels) per version and effective date.

Yellow Adjustment Factors
Yellow Adj. Factors opens the Yellow Adjustment Factor list, where the classifiers are maintained. The action is available in the ADU menu on both the States and Alerts page and the Requisition Worksheet. The classifiers and their fields are described in section Yellow Adjustment Factors.

SKU Card actions
The Related menu on the Stockkeeping Unit card exposes the DDMRP-specific actions for the selected SKU. Each action is highlighted in the screenshots below; where the action opens a page that is documented in more detail elsewhere in this guide, a pointer to that section is given.
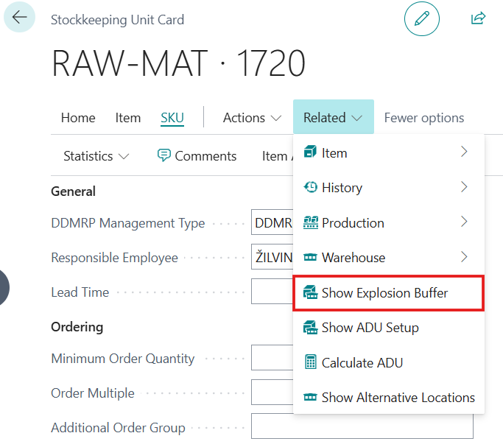
Show Explosion Buffer
Show Explosion Buffer opens the Explosion Buffer page for this SKU. See Explosion Buffer for the full field reference.
Show ADU Setup
Show ADU Setup opens the ADU Setup page for this SKU, where you can review its calculated ADU and the resulting buffer values. The page and its fields are described in section ADU Setup (see Actions related to ADU).
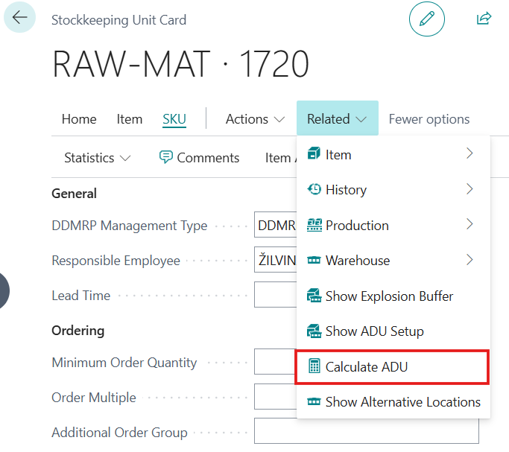
Calculate ADU
Calculate ADU runs the ADU calculation for this single SKU on demand — the action and its dialog are described in section Actions related to ADU. See Run Calculate ADU Values for the underlying batch routine.
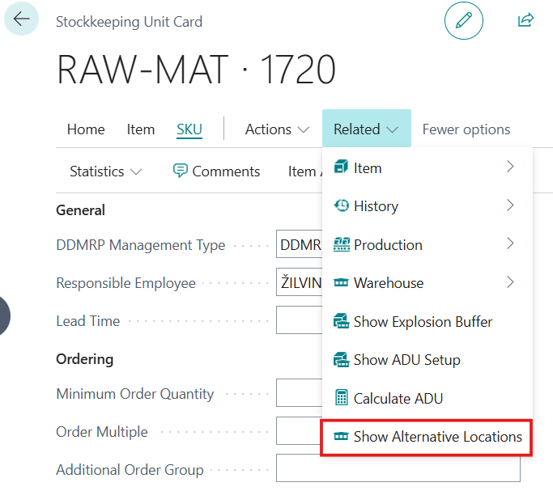
Show Alternative Locations
Show Alternative Locations opens the Alternative Locations page, where you can maintain the list of other locations that may supply this SKU when its primary location is short.
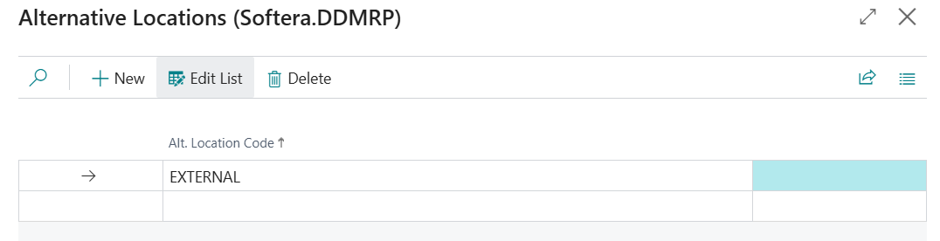
On the Alternative Locations page, use New, Edit List, or Delete to add, modify, or remove the locations the planner should consider for this SKU. Entries are sorted by Alt. Location Code and are evaluated in that order when the primary location cannot satisfy demand.
SKU FactBoxes
Several Softera DDMRP pages include FactBoxes on the right side of the page. FactBoxes provide additional information for the currently selected SKU or worksheet line without opening the SKU card separately. They help planners review the selected SKU's buffer parameters, inventory position, and planning values before making planning decisions.
Open the FactBox pane by clicking the info icon in the upper-right corner of the page (highlighted in the screenshot below). The pane lists the available FactBoxes for the page; expand a FactBox to see the values for the currently selected SKU or line.
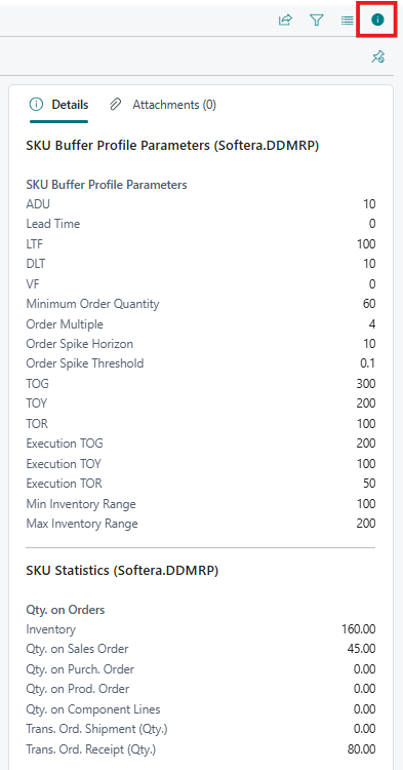
The available FactBoxes may include:
SKU Buffer Profile Parameters – shows the main DDMRP buffer parameters for the selected SKU, such as ADU, DLT, LTF, VF, Red Buffer, Yellow Buffer, Green Buffer, TOR, TOY, and TOG.
SKU Statistics – shows inventory and planning-related quantities for the selected SKU, such as quantity on hand, on order, projected on hand, net flow, and other values used in DDMRP planning.
Use FactBoxes when reviewing States and Alerts, Explosion Buffer, Requisition Worksheet lines, or other DDMRP pages where the selected SKU's context is important.